Tuesday, August 20, 2013

Ruffled Camera Strap

Inspired by THIS tutorial on how to make a camera strap cover, I got out my scrap fabric and tried to make my own version (minus the rosettes). I didn't measure and just sized up my scraps to my camera strap-I would NOT recommend doing this as it ended up taking a lot longer to complete and I did run into a few hiccups.....lesson learned: always measure, then cut. Here are a few photos of my project along the way:
Here are the scraps I chose. The very top one is actually a piece of thin cotton
batting that I wanted to used to pad the back side of the strap.

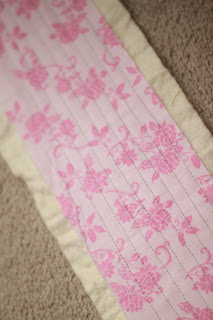
I wanted the part of the camera strap that would be resting on my neck to have a little padding, so I quilted my batting scrap to the fabric I wanted to use for the back of my strap.
 A close up of the quilting:

 Just like the tutorial said, the hardest part was turning everything right side out!

Here is a few shots of the finished product:


Wednesday, August 14, 2013

A new project....


This week I have been testing out a few felt flower tutorials that I found on pinterest with the goal to make some headbands for a newborn. I ended up NOT liking how large the flowers were turning out-they would have been great for a toddler, but I was looking for something much more dainty. So I ended up modifying the patterns and even created a felt flower all my own design.

Here are the instructions for a sweet little two-toned flower I made (it's the little purple flower in the photo above):

What you will need:
  1. Felt. I went to Michaels and bought the cheapy 9"x12" felt craft sheets. You will need 2 different colors for the flower itself and then a green for the leaves.
  2. Pen and paper for making your template
  3. Sharp scissors
  4. Needle and thread or a hot glue gun
  5. Plastic pearl, button, or other embellishment for the center of your finished flower.


I chose to sew my flower together because I wanted the plastic pearl I used as the center to be secured to the flower.

This flower was so fast and easy and I love that it won't be over powering. I ordered some skinny elastic that I plan to sew this flower onto to make a headband. Please remember that these felt flower can be choking hazards so you should never let a child/baby wear it without supervision.

Feel free to make and sell flowers from this tutorial, but please link back or credit my blog.

Wednesday, January 30, 2013

Flakey...

I have wanted a white watch for a while and saw this one over on laviepetite. So here is my review of the Merona white watch from Target via a picture, because "pictures are worth a thousand words" and right now I would only have 3 words to describe it: cute, but junk!

Watch: Target $12.99

This was only the second time I had worn this watch! So dissappointed. The paint continued to peel off and I ended up just pulling it all the way off so that the ring around the face is silver. Problem solved right? Wrong! a week and a half later and the paint is now starting to chip off the band. BOO.


Sunday, January 13, 2013

This week on pinterest....

Here are a few of my favorite things I found last week on pinterest:

Pinned Image
 
 
Pinned Image
 
 
Pinned Image
 
 
Pinned Image
 
Pinned Image
 
Pinned Image


Isn't that wedding picture AMAZING!?!?! I thought it must be from a magazine, but it's not.

Wednesday, January 2, 2013

Dry Erase Picture Frame Project/Tutorial!

I first saw THIS dry erase picture frame tutorial back around Valentine's Day and I HAD to make it. I loved it so much that when I was trying to come up with a craft for the 8-12 year old girls at church to make I knew they would love it too! So here is my trial run:

5 x 7 picture frame from Dollar Tree, $1
Acrylic Craft Paint in cobalt, $.80
Dry erase markers from Dollar Tree, $1 for 2


Step 1: Take the glass out of the frame and paint the frame.
The frame I purchased was plastic and so it took 3 coats of paint to get it all covered. Next time I may consider doing a primer coat first....


Step 2: Apply a generous coat of Mod Podge.
The acrylic paint will dry a matte finish and if you are happy with the way it looks, then you do not need to complete this step. I personally prefer a super glossy finish and once the Mod Podge dries that is exactly what you get! I love this stuff. (p.s. don't panic when you first put it on and it turns your frame a milky white color...it should be clear once it is dry).


Step 3: Put glass and scrapbooked page back in frame and glue embelishments to frame:
If you are wondering how to make the rolled ribbon/fabric flowers, check out THIS tutorial.


Step 4: Write 2 things each day you are thankful for!